This is my first post. So please be patience...
1)Open the InstallShield and create new Project by selecting "New" option from "File" menu or "Create a new project" from left panel.

2) Here you will find 4 tabs in New Project window namely Common, InstallScript,Windows Installer,
All Types.
- Select "Basic MSI Project" from the Common tab.
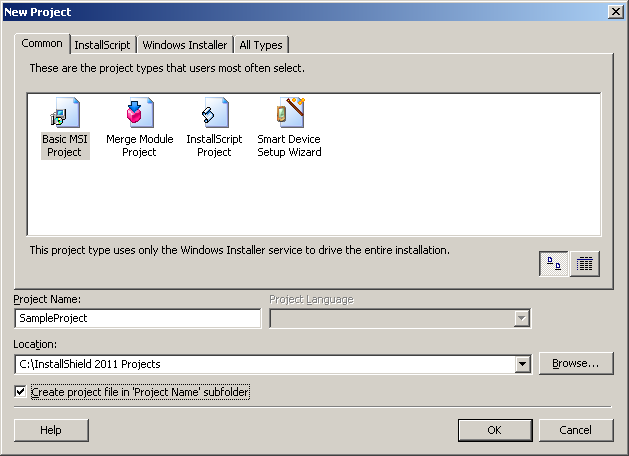
- Enter the name of your project in Project Name text box.
- Select the location of your project to be "Saved" by clicking "Browse" button.
- Check "Create project file in project Name subfolder" for creating file under project name folder and click ok.
you will not find "Microsoft App-V" in old versions.
- Project Assistant : This is used to create basic installer with few steps.
- Installation Designer : This is used to cutomize your project in detail (writing Scripts, Adding Mergemodules etc)
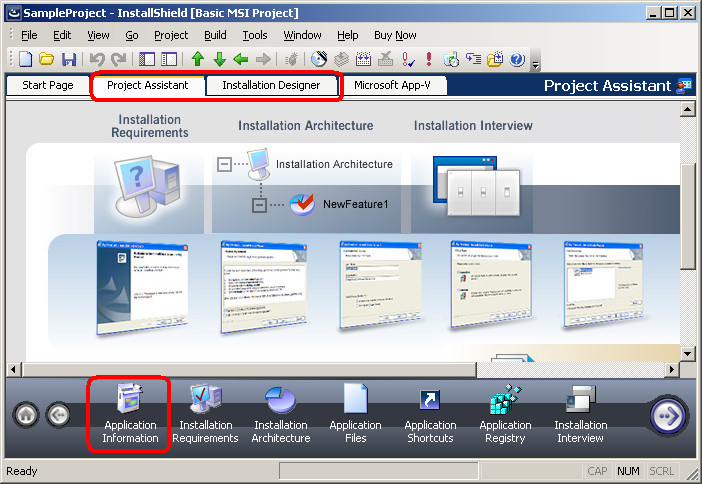
4) Select "Application Information" at bottom of the window. All the information of our Application can be described here.

- Give appropriate values in the fields.
- Here I have given Company as "My Company", Project as "SampleProject" and version as "1.0.0.0". You should know how the version numbers are given
- For example version 5.2.0.36 says5 = Major Release
2 = Minor Release
0 = Bux Fix release to public
36 = Development Build. - Select the icon to be displayed in "Target machine Control Panel". Default will be displayed as shown in above picture.
- Any more information to be given, then you have to use "Installation Designer". This will be explained in my next post.
5) Click on "Installation Requirement" tab
Here you can specify the requirements of your application needed before installing in target machine.
- Click on "Yes" if your application needs any Operating system. My application has to run on all OS, so i selected "No"

- Click on "Yes" if your application requires any software in target machine.
- Here i selected ".Net Framework 3.5" (Most of the .Net Applications require .Net Framework to be installed)
- Right to Software you can find "Run-time Message". This will be the message displayed for end user if the required software is not installed in user's machine.
- Edit the message bby clicking on it if needed.
- In our case the below message will be displayed if end user has not installed .Net Framework 3.5 before installing the Application.

6) Click on "Installation Architecture" tab. Here comes main part of the application.
We will specify all the features of our application here.
- For Ex: Let's take the installation of InstallShield2011. Here we can find "Main program files" and "Redistributables". If we select "Main Program files" then this feature will be installed.
- Here in this Application let's take two Features
- Feature1
- Feature2
- Again we can specify Sub-Feautres for Main features.
- Click on "New" button for creating Feature. Rename according to your requirements.

7) After creating Features of application, let's discuss about "Application Files"
- We can find the "Destination Computer" tree in left panel. Select the folder in the list under which the files should be installed.
- By default some of the Predefined folder's like "ProgramFilesFolder", "AppDataFolder" and "CommonFilesFolder" will be displayed.
- To add another folder like "MyDocuments", rightclick on any folder and select "Show Predefined Folder" and the you can find the list of folder's. Select the folder you needed.
- To add files and folder's to the feature, select the Add Files button to add files of select "Add Folders" to add folders.
- Select the files to be added.
- Always remember that the files will be installed under the feature which has selected while adding files.
- Here, in the below image we can see that file named "Feature1.PNG" will be installed only when "Feature1" is selected by end user while installation.
- To add files to another feature's, select the feature and add files to that respective folders.

- "Feature1.PNG will come under the "../ProgramsFiles/MyCompany/SampleProject/Feature1/Feature1.PNG" location in End user system.
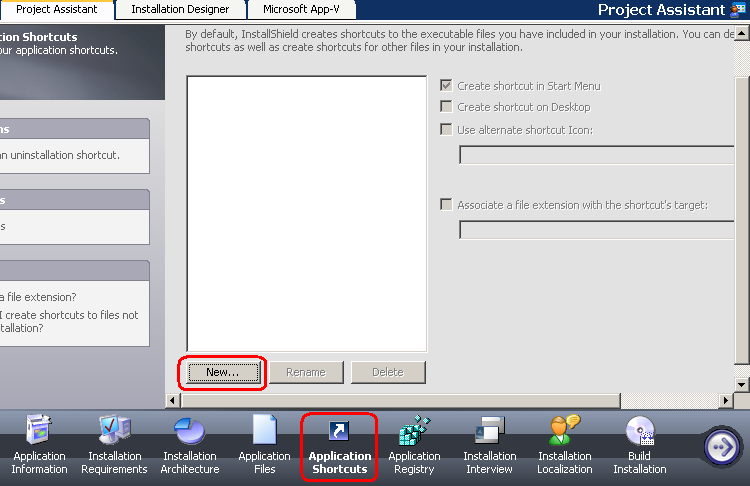
- Click on "New" button for creating shourtcut and select file to which you need to create shourtcut.
- Select the place where the shourtcut to be created.
- IInstallshield provides you to select your own shourtcut icon to be displayed to enduser.
- This application do not need the shourtcuts.
9) Now we come to most important tab "Application Registry".
Note: Please do not touch this tab if don't know about registry. System will crash if any registry goes wrong.
- Creating registry will be explained in next post.

10) Select "Installation Review" tab. This isntallation review is the collection of dialogs that your user will see
while running your application.
- Answer the questions appearing in the tab.
- Select the License Agreement file to display the license agreement to end user.
- Select "Yes" if you wnat to allow your user to change the location where the application to be installed.
- Select "Yes" if you want to allow your user to select some parts(Features) of your application.

11) Click on "Installation Localization" to select the language of your application. I am supporting my application only in "English". So i have selected only "English(United States)".

12) Atlast we have reached last "Build Installation" tab. Select the options in which you need your application to be build. InstallShiled provides you 4 options to select.
- Single Executable
- Internet
- CD-ROM
- Single MSI file

Click on "Build Installations" button to build your application.
The installer's will be reated under the "Release" folder in your application.
Take the installer and give it to end user.
All the above steps gives you the explanation how to build teh installer in simple steps using "Project Assistent".
To customize your application, to create scripts, execute sql scripts etc use "Installation Designer".
I am new to Installshield. This is more usefull in learning how to build an installer.....
ReplyDeleteThank you
thank you for posting this simple tutorial for new user to be introduced. Can you add more on how to use setup designer, which's the real installer designing part?
ReplyDeleteThanks again.
Nice one .. Neat and concise
ReplyDeleteThank you - most helpful.
ReplyDeleteThis is awesome, it has been most helpful to me.
ReplyDeleteI appreciate the help
Thank you,
Superb.. thanku
ReplyDeleteGood Guide :D
ReplyDeleteHi.. this is good to learn the things from basic
ReplyDeleteThank you for taking the time to share. Very helpfull
ReplyDeleteThanks for sharing!! Here I got the solution. The images were very helpful.
ReplyDeletemerci
ReplyDeleteReally helpful.
ReplyDeleteNew Slots - DrmCD
ReplyDeleteThe Best New Slots Casino | Get 100% Up 하남 출장마사지 To 동두천 출장안마 $100 Welcome Bonus - Daily Free Chips and Cashback From 영주 출장마사지 casino gaming to live 안동 출장샵 casino, 서울특별 출장안마 you are simply not